


3D printing at nass magnet
Innovation, layer by layer
The possible applications for 3D printing have become almost endless. From one-off prototypes and display models, to spare parts, to small series — 3D printing offers an extremely varied range of conceivable and cost-effective possibilities.
Realizable possibilities
Concept models (prototypes)
Quick and easy manufacturing of models to present and test the early concepts of a new product.
Functional samples
Depending on the process, material and model, these components achieve sufficient stability for functional testing of models.
Small series
Thanks to their high printing speed and reliability, modern industrial printers enable small series with an annual volume of <1000 units.
Injection moulds
3D printing can also be used to manufacture and test inserts for injection moulding tools at an early stage, before decisions about expensive tools are made.
- Assembly tools/aids
The use of 3D-printed assembly tools and aids in production saves time and money, while increasing ergonomics for employees.
Spare parts
can be printed quicky and easily in-house, e.g. if there are no more spare parts available or the supplier’s delivery time is too long. Suppliers no longer need to store spare parts for years after production has ended; rather, parts can be printed at the request of the customer.
Marketing models/mock-ups
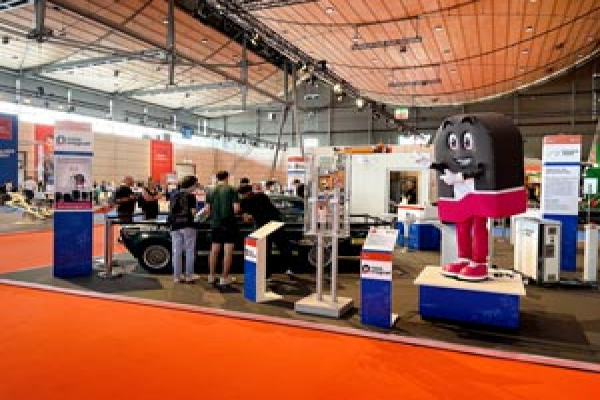
Production of models or advertising materials for prospective customers, e.g. at trade fairs.
Profitable benefits
Design freedom
Increased design freedom, thanks to lack of production-related constraints
Time savings
Shorter product development cycle, faster discover of design flaws, short adaptation time, fast implementation
Reduced costs
From design to production, errors in the development process can pile up rapidly. By avoiding errors and reducing lead times, costs can be reduced considerably.
Confidentiality
The confidentiality of project data is critical to the development of new products.
Simple printing process
The printing process on a 3D printer is almost as simple as printing in colour on paper.
Suitable for office use
3D printers can be set up directly in the office, As they are fully office-compatible, quiet and do not produce any disruptive emissions.
In general, 3D printing is an additive manufacturing process. This means that material is added to build up the product layer by layer. This process not only saves resources, but can be used to realise complex geometries that would be impossible, or very expensive and time-consuming, with conventional subtractive processes.
From a technical perspective, additive manufacturing offers the big advantage that ideas can be realised directly, and components and devices can be tested and flexibly adapted to the point of series readiness – all completely independently of suppliers. This enables shorter lead times, minimising development and production costs.
Overview of the most important 3D printing processes
The most important 3D printing processes can be divided into three categories: Solid free-form fabrication, liquid processes and powder bed fusion processes. The two material groups consist mainly of polymers and metals. The starting point for a 3D-printed object is always a digital model.
Solid free-form fabrication
FDM Fused Deposition Modelling (Filaments)
Most people should already be familiar with the FDM process, as it has already taken off in the private and amateur domain, thanks to drastically reduced prices and simple handling.
In simple terms, the process involves a meltable plastic thread (filament) wound onto a spool, which is pushed into the extrusion head by drive wheels. In the extrusion head, the material is heated above melting temperature by the hot end and pressed through a thin nozzle to create an even thinner thread – similar to a hot glue gun.
The thread is dispensed layer by layer to create a three-dimensional model on the print bed. The extrusion head is usually suspended from a door-shaped frame and can move along the X and Y-axes using electric motors. This connects all the threads within a layer into one finished surface. Once this layer is finished, the extrusion head moves up along the Z-axis by one layer. Then, the next layer is added to the cooled previous layer, and the process repeated until the 3D model is complete.
Before printing, the model, which is designed using a CAD program, must be divided into horizontal layers by the software and translated into the corresponding instructions for the motor controls. The instructions for the motor controls are created by a “slicer” software and transmitted to the printer. Many additional printing parameters can be adjusted using the software to ensure optimal printing results. Once the print is complete, it may be necessary to remove supporting structures from the component, but no further processing is needed.
Liquid material
Stereolithography (SLA)
In the rapid prototyping process known as stereolithography, or SLA for short, the workpiece is printed in a liquid bath of photopolymer (synthetic resin). A thin laser beam systematically moves across the raw material and hardens it to create the desired shape. Layer by layer, the print bed rises out of the liquid bath. In other words, the component is lifted out of the photopolymer from above. It is usually necessary to provide small support points, which are later removed manually. The laser beam moves through the liquid material extremely quickly, so the material is hardened just enough to be dimensionally stable. In most cases, the model is subsequently placed in a UV cabin to harden fully.
Polygraphy/PolyJet/Inkjet processes
Polygraphy – also known as PolyJet or inkjet printing – is a 3D printing process in which a polypolymer is applied layer by layer, and then hardened using UV light. To be precise: the component is built up in layers by a jetting head, which functions similarly to the print head of an inkjet printer. Support material is printed to allow printing of overhangs on objects. For this reason, 3D printers have two or even multiple jetting heads, which print build material and support material in alternation. The contours of the object are jetted onto the build platform, one layer at a time. A durable, dimensionally stable photopolymer is used as the material. The material leaves the printer in liquid form, and hardens layer by layer as it is exposed to UV light.
Powdered material
Selective Laser Sintering (SLS)
“Sintering” refers to a rapid prototyping process, in which 3D models are manufactured using a laser beam. The raw material forms a thin layer of powder, the particles of which are melted by a laser to bind the powder together, layer by layer. Subsequently, a structure is created from a powdered raw material via Selective Laser Sintering (SLS). This process can be used on various plastic-like materials. SLS selectively melts powdered materials, such as nylon, elastomers, alumide or polyamide.
Selective Laser Melting (SLM)
The SLM process is not too different from SLS. However, unlike Selective Laser Sintering (SLS), Selective Laser Melting does not sinter the powdered material. In the SLM process, the powdered material is melted locally using the heat from a laser beam directly at the processing point. The powder bed with the powdered material is heated to just below melting temperature. To prevent the material from oxidising, the print chamber is usually filled with an inert gas.
The search for the right 3D printer for nass magnet
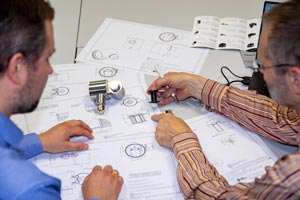
The search was conducted in collaboration with the NTE, NKV-P and NEP departments. To start with, we considered the following potential areas of application in the wider criteria:
Prototype/sample construction
Prototype tools, serial tools and individual components in fixture construction (mounts, workpiece carrier guides, test structures)
Packaging for prototypes and samples
Here, we quickly ran into several questions regarding the material properties, costs and processes and, on the first contact with 3D printer manufacturers, were asked to provide further information such as:
Which materials can/will be processed?
What is the continuous service temperature of the materials?
How strong should the materials be?
Surface quality/appearance?
How do the material properties change over time?
What tolerances apply?
What quantity?
Procurement costs/budget?
Follow-up costs?
Cost of the entire printing process?
Alternatives? (e.g. service provider)
It was not easy for us to choose from the many manufacturers and printing processes. It also quickly became clear that there would be no silver bullet. Every process and application of the various manufacturers has its advantages and drawbacks.
In general, the printing processes depends on the material used, which in turn depends on the required properties. The most important points for nass magnet, such as pressure tightness and temperature-resistance on small products with narrow tolerances, were not easy to find combined in a single device.
Since professional polymer 3D printers can cost between €2,500 and €65,000, depending on the technology, and metal 3D printers are even more expensive, investments should be carefully considered beforehand and pay themselves off later.
After considerable thought and further research, we opted for a relatively high-cost device, which would require the least amount of compromise.
Then, along came Covid...
Due to the intensifying coronavirus situation in the spring of 2020 and the resulting economic uncertainty, all non-production-related investments were initially postponed indefinitely. Since we saw a profitable advantage in the new technology, even in economically challenging times, and did not want to bring the project to a complete halt, we continued to look for an alternative…
Pilot project: 3D printer assembly kit
We created a pilot project and opted for a very reasonably priced model from the hobby segment for around €200, in the form of an assembly kit. It is based on the FDM process (see FDM-Fused Deposition Modelling (Filaments)), making it extremely simple to use and suitable for the office. With this purchase, we wanted to familiarise ourselves with the new technology and gain insights into where additive manufacturing could realistically be applied in our business.
The assembly was very easy and was completed in no time, ready for the first print job. The first few smaller test prints from the Internet ran without a hitch and we were more than surprised by the surface quality and accuracy of the components. Consequently, we started to seek out simple components in systems engineering, which were previously made of plastic and produced with conventional processes. The best example of this is an RFID tag holder, which is on almost every workpiece carrier of our circulation systems. The tag is used to encode workpiece carriers and transmits component-related data between the workpiece carrier and the system. Since every workpiece carrier is unique to the project and system, the holders are not available for purchase anywhere. The holder itself is not exposed to any mechanical stresses and is simply used to hold the tag, but remains necessary.
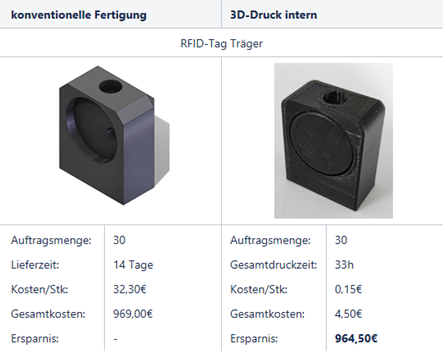
For the Twin Boost systems, for which we have received increasing numbers of orders from the customer in recent years, due to rising demand, we needed 30 holders per system in the main section, and 15 additional holders in the extension. When all these parts are 3D-printed, the savings enabled by the new technology quickly become clear. See graphic:
The weaknesses...
After several hundred hours of printing hours however, the weaknesses of such a low-priced device began to show. Wear on the guides and other components led to an increasing amount of set-up and maintenance work, as well as failed print jobs, if the work was not performed with extreme precision.
New insights from the pilot project
Thanks to the positive overall insights and print results achieved during the pilot project, we have developed a whole new approach. We discovered that parts produced using the cheapest process, FDM, were not the most aesthetically pleasing, but were fully adequate for prototype tools, serial tools, packaging samples and individual components in fixture construction (mounts, workpiece carrier guides, test structures).
As a result, we opted for a professional 3D printer, the Raise3D E2, which offers many automated functions and Industry 4.0 applications. It also uses the FDM process and features a dual extruder, which enables duplication printing, mirror printing and multi-material printing. The printer is already in operation and fully utilised at the Hanover site.
Outlook
As we occasionally receive requests from other departments, we are planning to provide the 3D printer as a resource for other projects in future. To achieve this, we need to train more of our employees and create a kind of “print service”.
In order to print higher-strength objects in future, the FDM process offers the option of using fibre-reinforced filaments. To do so, there are simple conversion kits for the Raise3D E2.
To offer customers prototypes for their products, the next consideration would be to procure e.g. an SLA printer, so that we can produce extremely precise, intricate structures and smooth surfaces.
New freedoms for engineers
When designing components, engineers were previously severely limited by production-related constraints, or the cost/effort outweighed the benefit. With additive manufacturing, however, chamfers, radii and cut-outs actually reduce material consumption and print time. Undercuts and elaborate contours are no longer a problem, and it is even possible to print internal cut-outs or embed standard parts and multi-materials, for example.
Conclusion
Now that additive manufacturing is used is almost 50% of enterprises worldwide, it was exactly the right step to gather experience in the field of additive manufacturing and familiarise ourselves with the benefits of this new technology. Although we have only been using this new production technology for a short time, it has already become an integral part of our activities. For one, it has encouraged our employees to be more creative and neatly complements the conventional production of components in our system engineering. While the technology continues to progress rapidly, serial production at high volumes or the complete abolition of traditional production techniques are not yet on the horizon.
Robin Paetz
Process Design, nass magnet GmbH